Showing posts with label Quilting. Show all posts

Tuesday, October 18, 2016

I make quilts sometimes!

It's been a while since I pulled out all my crafty toys and got to play.


I was recently invited to a friend's shower, so I jumped at the chance to make a quick baby quilt.  All of the fabric was already in my stash, and as you can see I did about the easiest pattern I could think of.

Overall it was a fun and easy reintroduction to quilting and a reminder of how fun it is to cut pretty fabric into little pieces and the sew it all back together again.  It also reminded me that I need to work on my binding technique a bit.


It was well received, which always makes me happy!

I think it's fair to say that my quilting bug is back and there will be lots more fun little quilts in my future.  I just hope I find enough babies to give them away to!


Thursday, August 7, 2014

Actual Crafty Content

In between all of my other summer adventures this year I have actually been doing a little bit of quilting.  I made this one in a bit of a rush between school getting out and my trip to Las Vegas.

I didn't have months and months to do anything complicated so I chose a fun pattern with lots of fabrics that had been used in other baby blankets for mutual friends, and a few special fabrics for this little girl.


I really love I-spy quilts, because you can tell stories with them, or play matching games, or counting games.  Heck, I really should just make myself one because I like them so much.


This particular little girl lives in France with her American mother and French father, so I made sure to include some flashes of France (see if you can spot the Eiffel Tower) and allusions to America (I spy some cowboy boots and an American flag).  And then, of course, there are rocket ships, kittens, pirates, pumpkins, and baked potatoes.  Because - why not?


I didn't have enough fabric in my stash for the back so I picked up something with a little international flair:  


And a few French phrases:


The backing all together:


It may not be heirloom quality, but it was made with love!!


Wednesday, September 11, 2013

Countdown

It seems like the holiday seasons start earlier and earlier every year, and I guess I'm not helping much.  I got a head-start on my holiday quilting and have finished up a little advent calendar quilt.


I know that I don't do well with super-precise piecing, so I went for a slightly wonky look.

 The date-counter is supposed to be a candy-cane but I wasn't super careful about matching up the stripes.  It's little, so I might re-do it if I can find some more scraps of that fabric.


The backing has two little sleeves.  I'll need to get a dowel or figure out some kind of way to hang it.  I didn't think that far ahead... but it's got sleeves... so that's a start!!


The trickiest part was the letters... I printed them out, and copied them onto iron-on backing... then ironed that onto the fabrics.  It took one or two before I managed to get them to look right-side-up.  
 

Ironed the backing to the letters, cut them out,  ironed them onto the quilt... and then tried to do some outline stitching.  As I stated above, it was somewhat less than precise.
Here's a little close up of the embroidery and trim. 


Honestly, it was a lot of work for such a small quilt... but I love it.  I think it will look festive when it's finally up on the wall.  

Sunday, July 14, 2013

Time And Relative Dimension In Space

I may be a bit new to the Doctor Who world, but I love the Doctor and all he stands for.  I've been so busy the last few years I would have loved the opportunity to step into that beautiful blue box travel the universe live all my crazy adventures, and then pop back home in time to go to school / work again. 

Alas, I'll have to settle for making my own mini-tardis pillow.


There's some basic piecing, and a bit of embroidery... but the big secret is, I used Time-Lord Technology.  I poured all of time & space into the heart of the TARDIS.


 The TARDIS is ... as you must know... bigger on the inside!

 
 It can travel through space... and time!  (although it only travels through time forward... and very slowly. ;)  )


A little bit of timey-wimey outline quilting on the TARDIS, and some wibledy-wobledy meander quilting in the sky.


Instructions which will be roundly ignored were embroidered on the door. 


It's just a lap-sized quilt.  Although, since I'm short, that's usually all I ever need.  Ooooh... and the plus side of making a pillow-quilt is that when it's all pulled out... I have a little pocket for keeping my feet warm! 


I think the Doctor would agree - Quilts are cool!

Tuesday, July 9, 2013

School's out for summer!!!

Spring term finished up in June, so I've actually had a few weeks to relax and breathe.  The very first thing I did was pull out my sewing machine and start playing with fabric.

Like most respectable crafters, I have an abundance of works in progress... fabric purchased, patterns planned out, everything I need except for time to work on them! 

I've had it in my head to do a Doctor Who TARDIS quilt for a while and finally started putting it all together.  
This is just the mock up to see if I had all the pieces right.  But I've been working on it and should have a finished object to show off soon. 


Here's the unquilted top:


In other news, the Sister's Outdoor Quilt show is this Saturday and I will be attending again so look forward to a post about that!


Friday, June 15, 2012

Playing with colors: Yellow


Here is the final quilt in my playing with colors series.  I liked the structure I used in the red quilt, but I wanted to try something a little different.  I also wanted to do a better job of blending the colors, unlike the total randomness of the blue quilt.

I divided out the colors into dark, medium, and light groups.  Then sewed together strips that blended from dark to light, and alternated which direction each strip went as I sewed it up.  I was thinking 'rays of sunshine' although generally those rays only go in one direction. 


The blending on this quilt is much better than on the blue quilt, and I like the way the difference in the level of contrast is  intentional rather than accidental. 


I went with minimal straight-line quilting on this one.  Yeah, that was partly laziness, but also because sometimes less is more.


I learned something really really significant on this quilt - the joys of a walking foot!  I was getting really frustrated by how even my straight lines were causing a lot of bunching and texture on the previous quilts.  In the past I've either tried to counter it by altering the direction I was sewing in every other row, or by just embracing the bunching with wavy lines.  But after my first line down the center of this quilt, I'd had it.  I really wanted it to just quilt flat!!!

So I went down to the fabric store and I picked up a $60 walking foot  (my whole machine cost less than $200 btw).   I set it up and sewed a bit on a practice scrap.  OMG!  Within about 10 stitches I was impressed.  I could not believe how much of a difference it made! The fabric wasn't bunching up - it was being fed evenly through the foot, and the stitches were so neat and even!  Everyone always talks about this gadget or that, and I'm always skeptical.  I simply had no idea that it would be so much easier, and look so much nicer to quilt with a walking foot!

In the end, I'm very happy with my walking foot, and I'm beyond thrilled with this quilt.  Who knew I'd be such a fan of yellow, but it is just so bright and so cheery and so yummy, it put such a huge smile on my face when it was all done.  There will definitely need to be more yellow in future quilts!

So that's what I've been working on this spring, playing with colors and trying to learn something about contrast.  I've got a few more WIPs but probably not much to post for a while. 


Thursday, June 14, 2012

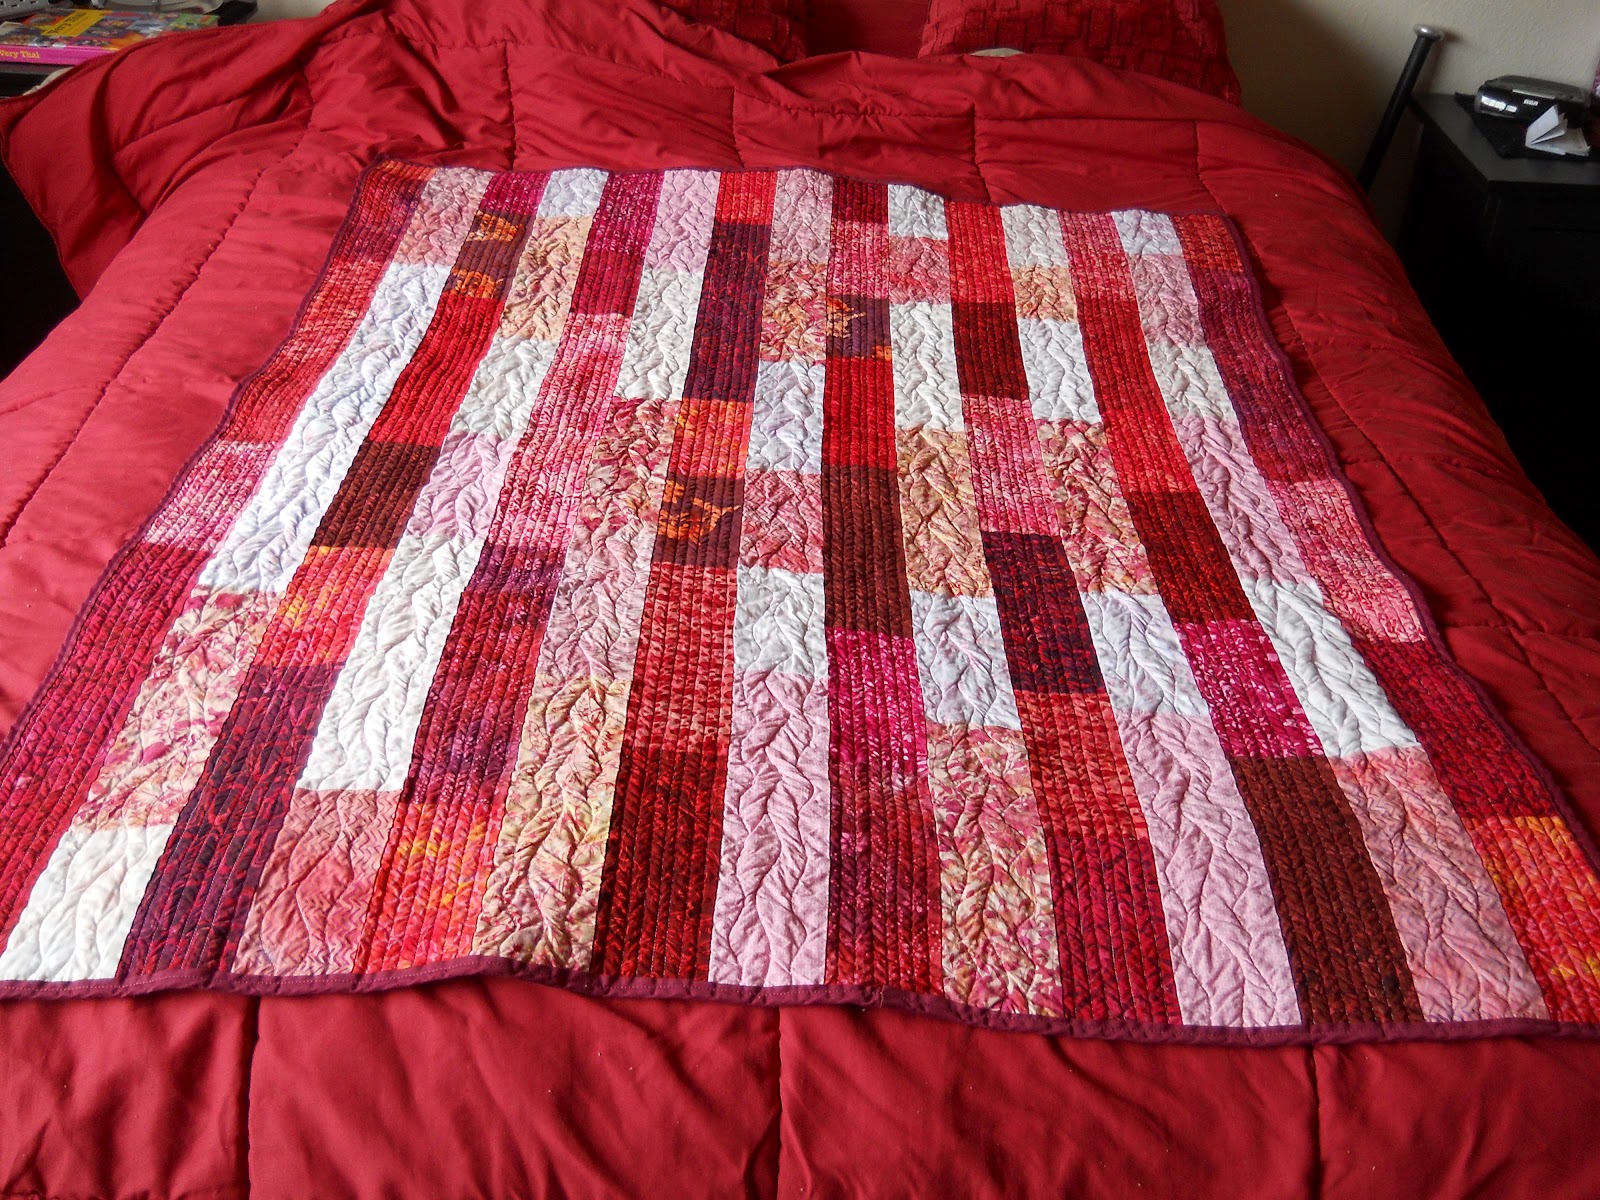
Playing with colors: Red

Here is the next quilt in my series playing with color and value. For this one I divided my fabrics into lights and darks, and further divided them into light lights & medium lights, and dark darks & medium darks. One stripe is alternating light light/medium light fabrics, and the next stripe alternates between dark dark and medium dark.


I used straight line quilting in the dark rows, and wavy lines in the lighter rows.  Kind of a darker reds = serious & steady,  lighter pinks = playful kind of thing.


I think this was a much more successful project than the blue quilt.  I do like the way I've given some organization to the colors, but still kept the individual strips somewhat random in size and distribution. 

So far, the lesson learned with these first two quilts is what happens when you randomly distribute high and low value colors (your eyes kind of bounce around the entire quilt), and what happens when you organize them (eye movement is more focused).  In these two examples, I definitely prefer the more organized approach.  But I do think this is something I want to keep playing with.

Wednesday, June 13, 2012

Playing with colors: Blue

For a while now, one of thing things I've wanted to do is work on a series of monochromatic quilts to kind of play with color and value, and basically as an excuse to buy lots and lots and lots of batik fabrics.

In between work and class and homework and occasionally cleaning house I've managed to put together three lap-sized quilts, each taking a slightly different approach towards color values.  All of them using stripes as the primary motif.  I'd already made my niece's quilt, and my big green quilt using this general technique... but I wanted to see what else I could do with it.

First up (or second if you count my green quilt) is blue.  I just used various length strips and alternated between dark and light blues.  The black lines were meant to give the quilt some visual structure and to bring down the overall color of the quilt into something a bit deeper.


I used straight-line quilting for the black strips, but wavy lines for the blue.  The intention was to evoke ocean waves.


Part of me thinks that this quilt was not especially successful.  It doesn't really evoke the ocean, and the variation between the colors is much too intense in places.

But on the other hand, the whole point of this series was to just kinda see what happened if I put the colors together this way or that way, and well, now I know.


Sunday, April 15, 2012

WIPs

Here are a few other quilts that I have in progress.  I'm really trying to finish these up before starting anything new because I am absolutely itching to buy an Ashford rigid heddle loom so I can learn to weave.  But as craft-crazy as I am, I do know that if I keep starting new hobbies, I'll never get any of these done!

Evergreen pyramids:

I had actually gotten as far as cutting out all the pieces and laying out the design, but then I decided that there were entirely too many light-light colors in the mix, so I kinda brought it back to square one and started buying more fabric.  I have several more dark greens now, and plan to start cutting them out this weekend.


Half-square triangle quilt, part 2:

I've been trying to transition my quilting stash into batiks, so I've cut up a good bit of my non-batiks to make these little half square triangles.  I have a couple pinwheel blocks left over from two previous quilts, and lots and lots and lots of HSTs.  I haven't yet settled on a design idea yet, I may just set all the triangles going the same way, but I might do some kind of zig-zag design.  I have to look at how many squares of each color I have to see what will work.


Scrabble part 2:

As soon as I finished up my first scrabble quilt for J., my sister declared that she wanted one as well.  Fortunately I bought most of the fabrics at the Fabric Depot outdoor sale (back when they had outdoor sales!) and had to buy full yard cuts... so I had enough of most of them to make both quilts.  I just had to order more of the letter fabric.

I've been plugging away on this one.  Putting together one quadrant at a time is really quick (takes about an hour) and very satisfying.  So this has been an easy project to work on here and there despite my classes & homework.


Thailand:

Gah - for such a small project this one is taking forever to finish up!  I was so inspired to do a project to represent my time in Thailand, and now I've been back for longer than I was gone and it's still not done!  I pull it out every couple months and kinda look at it, try to figure out how to get my ideas to translate into fabric.  This one is getting dangerously close to 'UFO' territory.


Amor:

I've been wanting to do a series of monochromatic quilts just to play with the colors.  I've actually sewn a bunch of these strips together but then, again, decided there were too many light-lights for the effect I was looking for.  So I went out and bought more dark red fabrics and need to go back to the cutting mat as it were.  The series will be all lap-sized quilts, and simple stripes, so they won't take me very long.... but with everything else on the table, who knows when I'll get them done.


Super secret incredibly awesome if I ever actually get it finished quilt:

I've got the fabrics, I've got a pattern sketched out, I've even put together a bit of a prototype for it.  I'm excited, but I feel like I will need a lot of free time and mental space to work on this... it's not really suited for putting together one small part & putting it away like the scrabble quilt is.  So, I plan to devote most of the month-long break between summer term and fall term to work on it.

The UFOs:


Yeah, I've still got this one hanging around (literally... in the closet).  And I've still got the two quilt tops I inherited from older relatives.  Someday.  SOMEDAY!  Some magical day when I don't have classes and don't have any more pressing / more interesting projects to work on I may actually pull these out and get them quilted up. Someday.

Saturday, April 14, 2012

Pretty Pinwheels

Well, I took about every shortcut possible quilting up Pinwheels, but it still took a while to get it all done.  


I just used diagonal wavy-lines for the pinwheel portion, stripes for the inner border and I was *not* about to outline-quilt each and every one of the 'piano-keys' so I just stitched a few lines on each side - just enough to tack it down.  Then machine stitched the binding.  Finished size is a bit under 45"x60"... a good lap size / baby quilt.


The backing - ugh.  I'm so lazy sometimes.  I didn't even check to see if it was all lined up properly before I started quilting it.   Oh well, maybe slanty quilt backings are the new 'modern' technique. ;)

Friday, March 30, 2012

Pinwheels in progress

Believe it or not I have been trying to squeeze in working on some quilts between work and taking Spanish classes.  I'd hoped to finish one up over spring break... but I'm not quite there yet.

Back well before 2008 I had decided to make a flower-basket type quilt for my niece.  This was the general plan:

And here were the first few fabrics I'd cut out :


But... it sat in a box for a good long time.  Finally last year I opened it up and did a test block.  I didn't like it and made a vague decision to just make a bunch of half-square triangles and then see what else I could do with them.  

HSTs are a bit addictive though... once you start it's hard to stop. 


Anytime I was bored (aka procrastinating to avoid writing a Spanish paper) I'd just cut up some 3 1/2" squares and spend an hour sewing them up.  I've probably got enough for a full sized quilt... but I don't like making big quilts so I'll probably make two smaller quilts.

First up - pinwheels!


That pink is not the background or anything - it's just the back of another quilt I'm using as a 'design wall' of sorts.  

I've actually added a 'piano keys' scrap border... and am about to start the quilting.  Hopefully I'll manage to finish this one up before I get swamped with homework from my next class!!

Wednesday, February 1, 2012

Craft Storage

I've been enjoying a few discussion threads on how people store their crafting stashes, so I thought I'd share mine.

Since I live alone, I have the freedom to use the entire living room as my 'craft room' which suits me just fine.  I do like to keep things tidy so that if I wanted to have people over, I wouldn't have to spend a week hiding all my projects.

Knitting:
Knitting is really my travel-hobby so my stash is pretty small, and honestly I don't have that many projects in the works.

The top two hat boxes contain misc. quilting and sewing tools. The box on the bottom contains all my embroidery thread, hoops and patterns.  The pink striped hat boxes contain my yarn stash, the blue wine-box contains my sock yarn, and I try to limit my WIPs to what will fit in the bag.


Official 'stash' yarn... no projects in mind for any of it.


Current knitting WIPs - a mindless scarf to go with a hat I made a few years ago, Shedir cabled hat, and well, not really in progress yet, but I was going to cast on for a new pair of ankle socks.

Quilting:
I've got a lot more quilt projects in progress / in mind than knitting.... but my fabric stash is still fairly small.  It's kind of surprising because I feel like I'm forever picking stuff up at Fabric Depot... but I guess I've also made & given away quite a few quilts, so there you go.


The fabric stash is divided into the following categories: batik, non-batik, holiday, character prints.  From there I group the fabrics by dominant color - more or less.  I've also got a box of scraps that have been cut down into 2x2 or 3x3 or 1x3 pieces.  Although I have many specific ideas for what to do with these fabrics... they're not really in the 'active' phase yet.  There's sewing fabric in the purple rubbermaid bin... and I keep my batting in another bin in the closet.


These are the quilts in progress... or in some cases quilts in hibernation.  This is also where I keep my box of real scrap scraps.  On the top shelf are all my crafting books and magazines. 

Finally... my 'craft table' where all the magic happens... is just my dining room table.  But I also have a folding table (in the back) I bring out for cutting sometimes. 

Overall I'm pretty happy with my 'craft room' and stashes.  I like having everything easily accessible... but also neat enough that I can put it all away pretty quickly.  I'd love to have a ton more fabric... but realistically I know I don't have nearly enough time to make all the quilts I'd like to... so it's good to keep the stash somewhat lean. 

So how do you organize your crafts?  Do you limit your stash to materials for specific projects or do you have a 'stash of possibilities'?  I'd love to see everyone else's craft rooms. 

Sunday, October 2, 2011

Evergreen - stripes

I have been working on the Evergreen quilt, but I wasn't happy with the contrast of colors once it was all laid out.  There are just too many light colors.  So I cut a few more dark greens laid them out but still wasn't really happy with them.  I got really tired of cutting out triangles so I decided to switch gears.

Ever since I made this quilt for my niece, I've wanted one for myself.


It's super easy - just started cutting up strips in dark, medium, and light values and just sewed them all up in that order. The quilting is just wavy lines.  It's as close to instant gratification as quilting is going to get.


Technically it's twin sized - 72ish by 90ish, but it covers the top of my queen sized bed really well.

Here's the back.


I just adore these fabrics, and in this pattern I do like the light/dark contrast.

And I'm getting better at the binding I think.  I'm actually starting to make good quilts! 


 Yay!